Diorama/Fantasy
 |
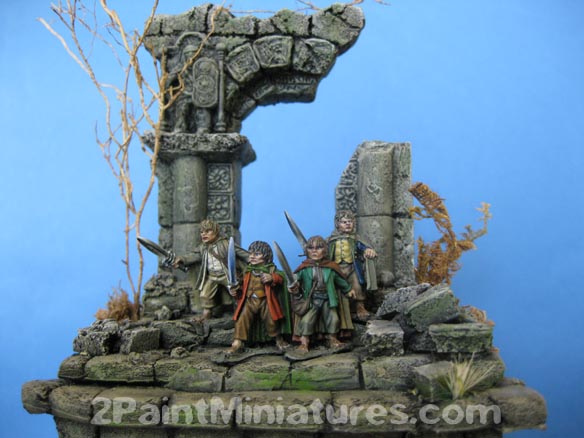
This particular tutorial shows you how to plan and build a small diorama with five 28mm miniature figures. All the five miniature figures are from the Games Workshop Lord of the Rings range. When you are planning a small diorama, you will need to have a story first before you can proceed with the planning. |
For this project, the story I chose was the part where Aragorn and the four Hobbits were heading towards Rivendale. Thay had taken refuge at an old abandoned fortress called Amon Sul or also known as Weathertop. This was the part where the Ringwraiths had caught up with them and were about to repossess the ring from Frodo Baggins.
Naturally outnumberd and encircled by the Ringwraiths, Aragorn and the four Hobbits were forced to fight out of the predicament. The diorama depicts the scene right before the five heroes come face to face with their undead pursuers.
Once I have finalized the story I wanted to do, I started sketching the diorama to get the best possible visual that I could achieve.
The Plan
Once brainstorming is out of the way, I put all my ideas down onto paper so that I don't forget what I am trying to achieve. Checkout the video below to see the summary of the project from begining to end.
Scratch building the dioramaFor most of my projects, I normally use foamboard or styrofoam as the foundation of the diorama. To add texture, I add corkboard and apply putty on top of it. To create details like a design on the doorway, I used greenstuff. Painting the DioramaI used Folk Art Acrylic Paint as the basecoat of my diorama as well as for the highlights and shade. Plenty of drybrushing on this part. |


